Selfie w Twins

Achievement unlocked: selfie with twins (sort of).  Yes, the below image is a little blurry, but it is my favorite because:

  • In an effort to keep everyone attentive, I was singing “Silent Night” here.
  • My singing apparently caused A to crack up.  This is the very first time I have seen her smile.
  • My singing apparently caused H to throw signs to other members of his very tough, plaid-wearing baby gang.
Selfie with H and A

Christmas Eve Eve Dinner Party

A & H ready to party

We had a few folks over for dinner last night (nine people around the table, plus twins in various arms), and, as usual, I was so busy hosting and enjoying that I neglected to snap any photos.  Luckily, I did take a few minutes before the shenanigans got under way to catch the twins (age 6.5 weeks) in their dinner party outfits.

Here are some spiced candied pecans that I put out with the appetizers and then again with dessert.  They are that good.  Recipe is from Smitten Kitchen.

And today is the first time ever that the twins are wearing shoes.

Cork Strip Art Wall

Long before their small motor skills are minimally developed, kids in daycare bring home a lot of art.  A lot.  Of art.  And by art, I mean concoctions of construction paper, glitter, popsicle sticks, marker, glue, paint, yarn, crayon, rips, and tape that sometimes defy description by even the artists themselves.  (We could have a whole discussion, of course, about whether any artist is truly qualified to describe her own work, but that is BSTB – Beyond the Scope of This Blog.)

Art wall, take 1:

What does a loving parent do with all of this treasure?  Well, this one tried a few different strategies, and the second to last strategy was a kid art wall.  Husband D is a little twitchy about tape on the interior walls (as I discovered the first Holiday season during which we cohabited, when I scotch taped all the cards we received to a door frame and he had a verrry quiet conniption.  Now I use painter’s tape.  Much better.), so I surfed Pinterest (briefly — I am a bad Pinterester) and eventually settled for stringing wires on the wall and clipping the projects to them.  The available wall was mostly vertical, however, so I did something I hadn’t seen on Pinterest: I mounted the wires vertically (with Command hooks at the top and bottom).  It ended up looking like this.

Art Wall, take 1, with wire. Feb 2016.  I know, the Command hooks are out of frame.  If I could turn back time . . .

Cute, right?

I might have known, however, that craftier Pinteresters than I had rejected this system for a reason.  My smug sense of self-satisfaction faded over the subsequent months, when the wires occasionally but persistently failed to actually stay on the wall.  I came to realize that the Command adhesive (in the size hooks I used — no offense, adhesive monolith 3M) was insufficiently strong at the key points.  Sometimes the wall’s failure was exacerbated by the dog’s tail’s hitting the whole setup as she trotted by.  Thanks for nothing, dog.

I made this gif with GIPHY. Never did that before.

Art wall, take 2:

The next and final version of the art wall involved these cork strips and this Gorilla tape.  (Sorry, honey. I love you.)  I lined the cork strips up vertically end to end, trimmed the two at the bottom (This involved a cleaver. It wasn’t pretty. Did I mention that I am really not that crafty?), taped the ends of each strip to the wall et voila!  Art wall!  I then mounted the art on the cork with clear plastic push pins.

Et voila! That’s the sum total of my French.
Family Portrait by M, age 4. Crayon on paper.

EDIT:  M saw her family portrait on the wall and chided, “It’s upside down!”  Of course it is.  Sorry, M.  Here’s the corrected image, which does actually make more sense.

Right side up.


Santa, according to M

December 6 is apparently St. Nicholas Day.  Four-year-old daughter M and I went to a little event at our church with dinner, crafts, and story time about St. Nicholas.

M as Santa, sort of.

Near the end of story time with Pastor Hughes, she talked to the kids about similarities between St. Nicholas and Santa.

Pastor Hughes: Have you ever seen Santa at your house?
Kids: No.
PH: Why do you think that is?
Kid: Because he’s invisible!
PH: Well, I’m not sure he’s invisible. Can you think of another reason?
*pause*
M (age 4): He’s nocturnal.

Vocab for the win, you guys.  Next up: crepuscular (active at dawn and dusk).

Santa and a skeptical-looking me. Circa 1980?

The Chop Wizard

I know, I know, the only cutting tool a chef really needs is a sharp knife.  Chopping an onion is tearfully breezy.  Do you remember in Julie & Julia (2009) where Julia Child (Meryl Streep) has to practice cutting onions in order to compete with the dude chefs?

via GIPHY

Knife skills are basic as far as a chef is concerned.

Here’s the thing, though: I ain’t a chef.  My knife skills are distinctly amateur, and I get really tired of chopping vegetables.  Like, the prospect of dicing a bell pepper is exhausting to me.  Enter the one, the not-so-only Vidalia Chop Wizard.

This $20 plastic and metal marvel makes short work of vegetable chopping.  You place your vegetable chunk on the metal grate, then use the white plastic lid to push it through the grate into the clear plastic bin below.  Depending on the degree to which the food fights the process, the Chop Wizard’s pushing motion makes a substantial, sometimes very loud thunk as the two halves of the device become one.  The gadget’s two grates make it possible to chop foods into satisfyingly regular half- or quarter-inch dice.

I use this thing all the time, in recipes like Black Bean and Cauliflower Soup, where the prep is way easier with the Chop Wizard than it would be without.  If you are considering this handy tool, ignore the cheesy sticker/label, do not use it on a wood surface (wood can end up imprinted with the shape of the round plastic feet), and make sure that any sweet potato planks you chop are relatively thin.  Enjoy!

Instant Pot Hard-cooked Eggs

I’ve been eating a lot of eggs recently, and boy, does the Instant Pot make hard “boiling” and peeling those suckers a breeze.  (I think technically, they are steamed?  Or — duh — pressure cooked, I suppose.)  I looked around the interwebs a bit and settled on the following method for perfectly-cooked Instant Pot eggs.  There seem to be a few different ways that people do these; this is just the one I tried today.

I sliced one of the eggs to add to my breakfast of bagel thin, cream cheese, cucumbers, and smoked salmon.  Here’s half of the resulting yumminess.  (If you care about WW points, both halves totaled 5 FSP.  Three for the bagel thin, two for one tablespoon of cream cheese.  The cukes, salmon, and eggs are zero.)

Not the prettiest photo I ever took, but way yummy.

I cooked all the thirteen eggs that we had (what’s that, husband D?  You were going to scramble a couple?  Er, sorry about that.)  In the interest of Science, I placed half of them (OK, six of them) directly into an ice bath, and plopped the other half (seven) back in the carton and the fridge.

Science.

Once they were all cool, I peeled and ate one of each kind of egg.  Far as I could tell, they were totally the same: beautifully cooked, with easy-peel shells and no green ring around the yolk.

Instant Pot Hard-cooked Eggs | serves as many people as you use eggs, I guess |WW FSP 0 per egg

Ingredients

Large eggs

Instructions

Pour a cup of water in the bottom of the Instant Pot.  Insert the trivet that came with the IP.  You can use a steamer basket instead of the trivet, if you prefer.

Pile up the eggs.  They can touch the side, each other — it’s wild, I tell you.

Close the lid and cook at high pressure for two minutes.  Use natural pressure release for 11 minutes, then quick release the rest.

If you need your eggs cold immediately, go ahead and plunge them into an ice bath.  (Note: proper enunciation is the only thing that distinguishes the spoken phrase “an ice bath” from “a nice bath.”  I know this because someone I know used to be an ice dancer, and when I pass along this info in conversation, listeners think I am describing this guy as a nice dancer.  Which he is, but no, I mean that he used to be an ice dancer.  Hilarious.)

Ice dancers. I’m sure they are nice, as well.

If, on the other hand, you have used all your ice to make G&Ts, feel free to just plop the cooked eggs back into the carton or into a bowl and put them back in the fridge.  Note that if you live with anyone with whom you typically share groceries, it is a kindness to communicate to him/her/them somehow that these particular eggs are already cooked.  Otherwise: s/he goes to crack an egg for a scramble and — what?!  Not that I know this from experience or anything.

Instant Pot Black Bean and Cauliflower Soup

I gave my husband, D, an Instant Pot Ultra for his birthday last month, and for a short but real time, I was scared of it.  Pressure cookers are dangerous, right?  Steam could just pour out and scald me any time, right?  Wrong.

Now that I’ve actually read some of the documentation and used the thing a little, I know that the gadget that Kevin Roose of the New York Times called “this holiday season’s must-have gift — a Furby for foodies” is perfectly safe and eminently predictable.  Our four-year-old daughter is way more volatile than the Instant Pot.  (Then again, maybe that’s not that high a bar.  Or low a bar?  Not totally sure this expression makes sense in this case, but, you know, just go with me here.)

And now, I am riding the Instant Pot wave to deliciousness.

Today, I tried making black bean soup in the Instant Pot.  I incorporated a bag of “Cauliflower Crumbles” (aka “riced” cauliflower) that I had bought on impulse this week.  Cauliflower is, as the whole trend to “rice” it, implies, relatively neutral in flavor.  D and I have used it before as (1) the base for creamy mash, (2) in potato soup, and (3) roasted in steak or florets form with salt and cumin.  I figured it would take on the strong flavor profile of the black beans well and would add a little bulk to the soup.

I knew the resulting soup would be healthy — or, perhaps more correctly, healthful.  It was also pretty darn tasty.  M, the four-year-old, ate it (although she needed me to spoon it for her, a request that has become more frequent since six weeks ago, when twin siblings A and H were born.  Fair enough, don’t you think?).  After tasting this soup, husband D wondered out loud whether he could bring it in for the lunch he has signed up to provide for 8-10 coworkers next month.  (Answer: sure.  It’ll be easy to bring the Instant Pot along to work if D wants.  Note that he drives there; he has no public transportation to negotiate.  This is key.  My friend H has been given an Instant Pot by her boss, but it’s at work — two subway rides and one commuter rail ride away from her Brooklyn home.  Meanwhile, she was inspired/compelled/possessed to open the box by CUTTING OFF THE PLASTIC CARRYING HANDLE.  That appliance is never going to see Brooklyn.)

Returning to my point: three out of my five family members (including me, naturally.  Is it still cool to say “natch?”  No?  Asking for a friend.) gave this recipe a thumbs up.  The twins did not express an opinion.


Instant Pot Black Bean and Cauliflower Soup | serves 10 | about 1 1/2 cups per serving | WW FSP 1 per serving (according to the in-app recipe builder; I tend to count this as a zero point food)

Ingredients

  • 1 medium onion, chopped (The Chop Wizard can help, as always)
  • 1 red bell pepper, chopped
  • 1 green bell pepper, chopped
  • 3 stalks celery, chopped small
  • 1 large carrot, chopped small
  • 1 14.5-oz. can diced tomatoes, undrained
  • 1 pound dry black beans, rinsed
  • 16 oz. cauliflower crumbles (cauliflower, diced or riced)
  • 1 teaspoon salt
  • ½ teaspoon black pepper
  • 1 teaspoon hot sauce
  • 1 Tablespoon paprika
  • 2 Tablespoons chili powder
  • 2 Tablespoons cumin
  • 2 bay leaves
  • 6 cups chicken broth (for vegan version, substitute vegetable broth)

Instructions

Add all the ingredients to the Instant Pot and close.  Stir it if you are so moved.  Seriously.  That’s all the prep there is here.

Cook on high pressure for 40 minutes; then use natural pressure release.  With pressure build and release, cooking time ends up being over an hour.  Open the lid and hunt down and remove the bay leaves.  Taste and add salt and/or hot sauce if you like.

Serve with toppings.  Put them all in bowls and pass them around the dinner (or lunch) table.  Possibilities:

  • sour cream
  • shredded cheddar
  • chopped cilantro
  • diced avocado
  • tortilla chips or strips
  • lime wedges for squeezing

Experiment

Hello!  This inaugural post is inspired by the lunches I made today for two-year-old daughter M.  Like many lunch-making parents, I try to put together meals that are relatively healthy, with a balance of food groups and without a bunch of processed stuff.  In general, I try to incorporate at least the following into each lunch: one protein serving, one vegetable serving, one serving of whole grain/carbs, and one serving of dairy.  Once in a while, I throw in fruit, but M tends to get fruit at breakfast and dinner, so I usually lay off it at lunch.

Today was a what’s-in-the-fridge? kind of day.  There was no considering of recipes or shopping for particular ingredients.  I started with the idea of putting some brown rice in the rice cooker.  I had a couple of blocks of extra firm tofu in the fridge.  I had some veggies.  Felt like a stir fry of some kind.

Brown rice went into the rice cooker first.  Then, I did a bunch of other stuff while the rice . . . you know . . . cooked.

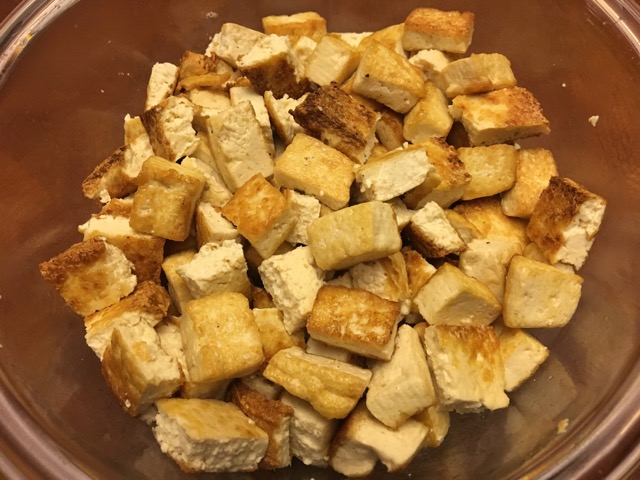
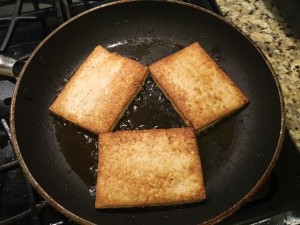
I drained the blocks of tofu and blotted them dry-ish with paper towels.  I cooked the tofu in the only way that I’ve ever really had much success with:  I put a tablespoon or two of sesame oil in a nonstick pan with an equal amount of cooking/canola oil.  I turned on the burner pretty high, and when the oil shimmered, I added one block of tofu.  Today, I tried two ways of cutting up the tofu: in cubes and steaks (to cut into cubes after frying).  Both methods were fine, but I think I prefer the control I have over the color of the steaks.  See how they got nice and brown?

IMG_9457 (1)Here is how the tofu looked after all the cooking and cubing:IMG_9458 (1)
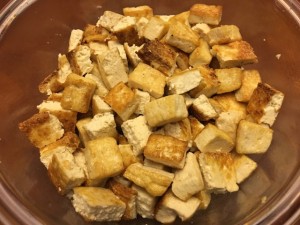
I guess they’re not so much cubes, are they?  Rectangular prisms?  Did I mention I used to be a Math teacher?

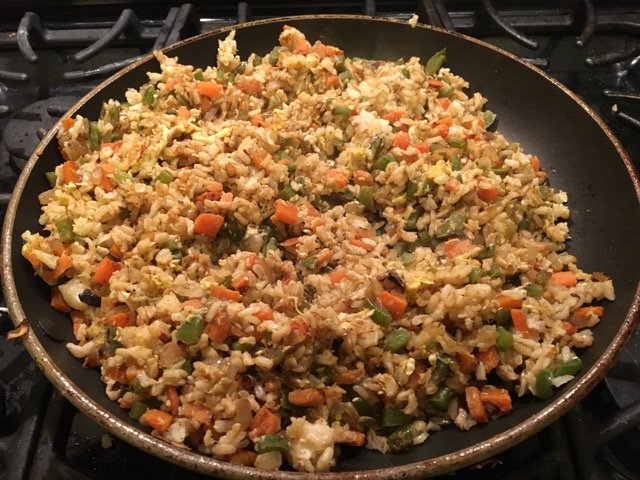
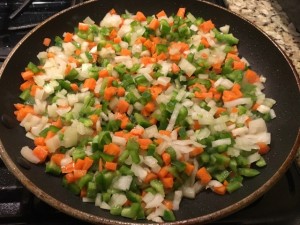
OK, so now I chopped an onion, a green pepper, and some carrot.  I added a little more sesame/canola oil to the pan, turned the heat up high, waited for the oil to shimmer, and added the veggies to the pan.

IMG_9460
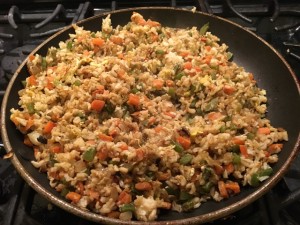
I sauteed the veggies until they were soft, and added a tablespoon or so of jarred minced garlic and some Chinese five-spice powder.  I sauteed for a minute or so until fragrant, then added three or four cups of the cooked rice.  I cracked two eggs on top of the whole thing and stirred it all up, still over the high heat.  Once the eggs were cooked, I seasoned with a couple of tablespoons of soy sauce.

IMG_9462
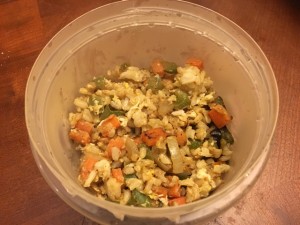
I portioned the fried rice into five two-cup containers like this one:

IMG_9464
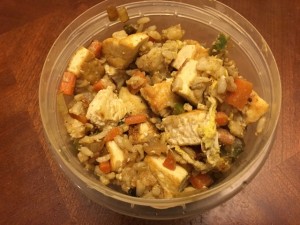
Then I added about a heaping half cup of the tofu to each container and stirred it in:

IMG_9468
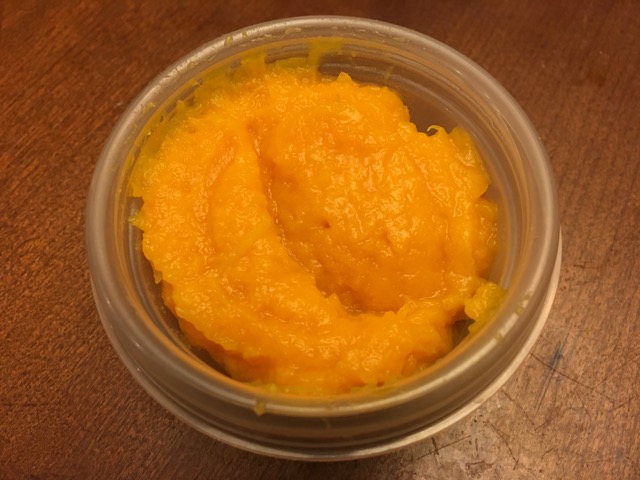
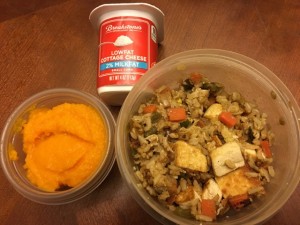
Yes, this has some veggies in it, but I wanted more in M’s lunch.  I had some butternut squash puree leftover from Thanksgiving, so I portioned some into half-cup containers like this:

IMG_9473
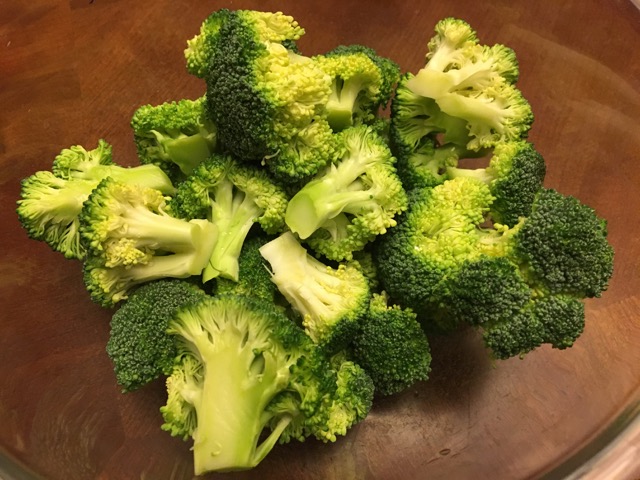
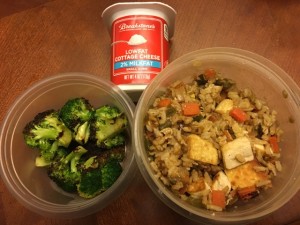
Of course, there wasn’t enough squash for five portions, so I also prepped a broccoli crown into florets . . .

IMG_9471 
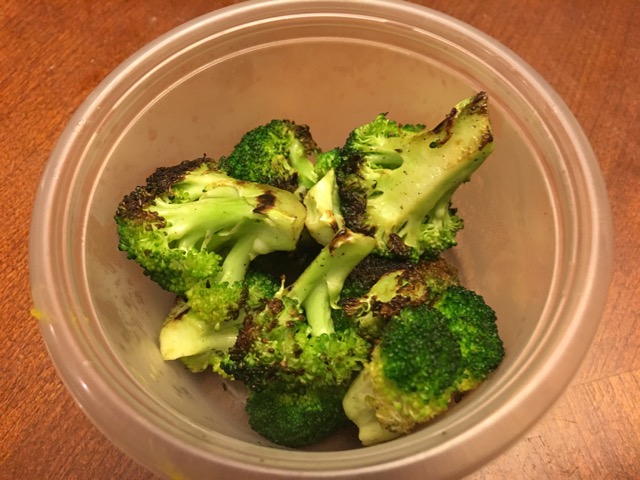
. . . and stir fried it in the same sesame/canola oil mix over high heat until bright green with some charred spots.  I put a half cup or so of this into some one-cup containers, like this:

IMG_9478
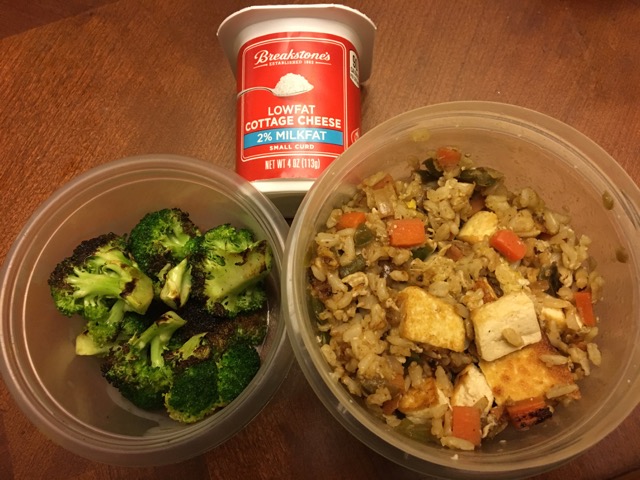
With protein, grain, and veg all set, I added a serving of one of M’s absolute favorites, cottage cheese.  This week, M’s lunch will be one of these two options:

IMG_9481IMG_9480That’s it.  First post complete!